TAsker User Guide

TAsker is a desktop app for Teaching Assistants (TAs) in the NUS School of Computing (SoC) to manage student administration, optimized for use via a Command Line Interface (CLI).
TAsker provides 3 main features to help you to manage student administration:
- Student Details Management
- Class Attendance Management
- Consultation Management
It retains the benefits of a Graphical User Interface (GUI). If you can type fast, TAsker can get your administrative tasks done faster than traditional GUI apps.
This user-guide has been written with equivalent effort by all members of the TAsker development team. For
Table of Contents
- Quick Start
- Navigating the User Interface (UI)
-
Features
- Viewing help :
help - Adding a student :
add - Listing all students :
list - Editing a student :
edit - Locating students by name :
find - Deleting a student :
delete - Clearing all students :
clear - Checking for a student’s attendance :
showatt - Marking student’s attendance :
attend - Unmarking student’s attendance :
unattend - Adding a consultation :
add-consult - Deleting a consultation :
del-consult - Listing all consultations :
list-consult - Archiving data files :
archive - Exporting attendance :
exportatt - Exiting the program :
exit
- Viewing help :
- Frequently Asked Questions (FAQs)
- Command Summary
Quick Start
-
Ensure you have Java
11or above installed in your Computer. -
Download the latest
TAsker.jarfrom here. -
Copy the file to the folder you want to use as the home folder for your TAsker.
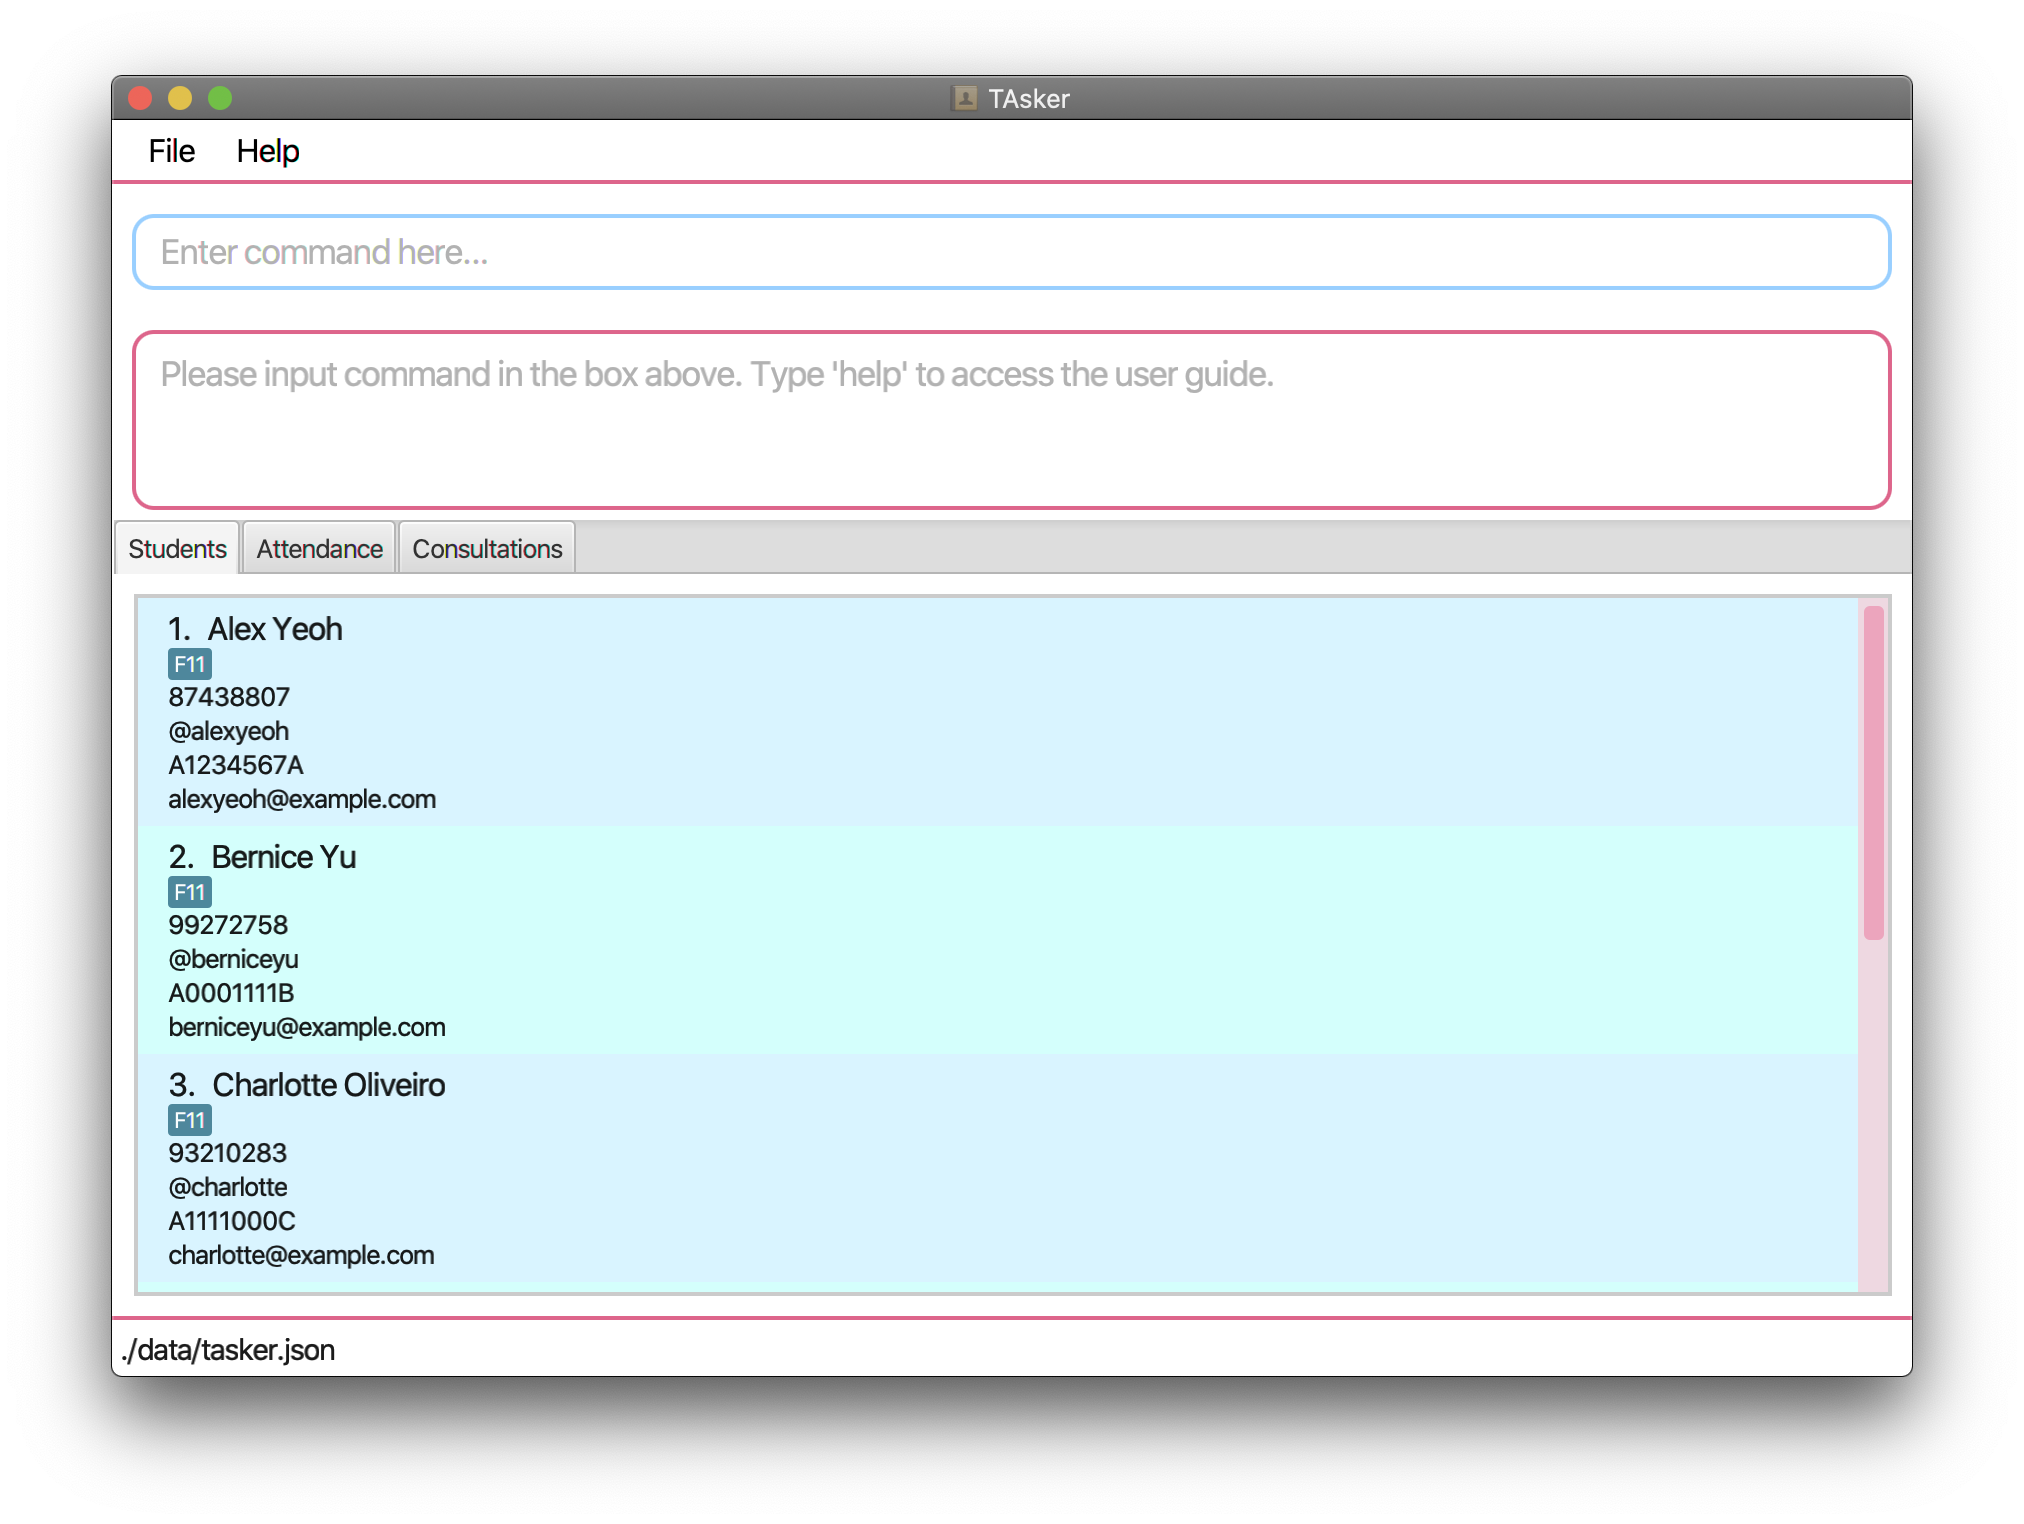
- Double-click the file to start the app. The graphical user interface similar to the below should appear in a few seconds. Note how the app contains some sample data.
 Note:
On newer macOS machines with stricter security settings from Apple, you might need to Ctrl-click on the file, then click on “Open” for your very first run of TAsker. This ensures that TAsker is trusted by your machine. You can then continue to double-click the file for your subsequent runs.
Note:
On newer macOS machines with stricter security settings from Apple, you might need to Ctrl-click on the file, then click on “Open” for your very first run of TAsker. This ensures that TAsker is trusted by your machine. You can then continue to double-click the file for your subsequent runs.
-
Type the command in the command box and press Enter to execute it. e.g. typing
helpand pressing Enter will open the help window.
Some example commands you can try:-
list: Lists all students that you manage in TAsker. -
addn/John Doe p/98765432 e/johnd@example.com t/johndoe m/A0123456B tg/friends: Adds a student namedJohn Doe(with his associated data) to TAsker. -
delete3: Deletes the 3rd student shown in the students’ details list. -
clear: Deletes all students from TAsker. -
exit: Exits TAsker.
-
-
Refer to Navigating the User Inteface for details on how to navigate TAsker’s interface.
- Refer to the Features below for details of each command.
Navigating the User Interface (UI)
The user interface of TAsker comprises of the few main elements as shown in this diagram:
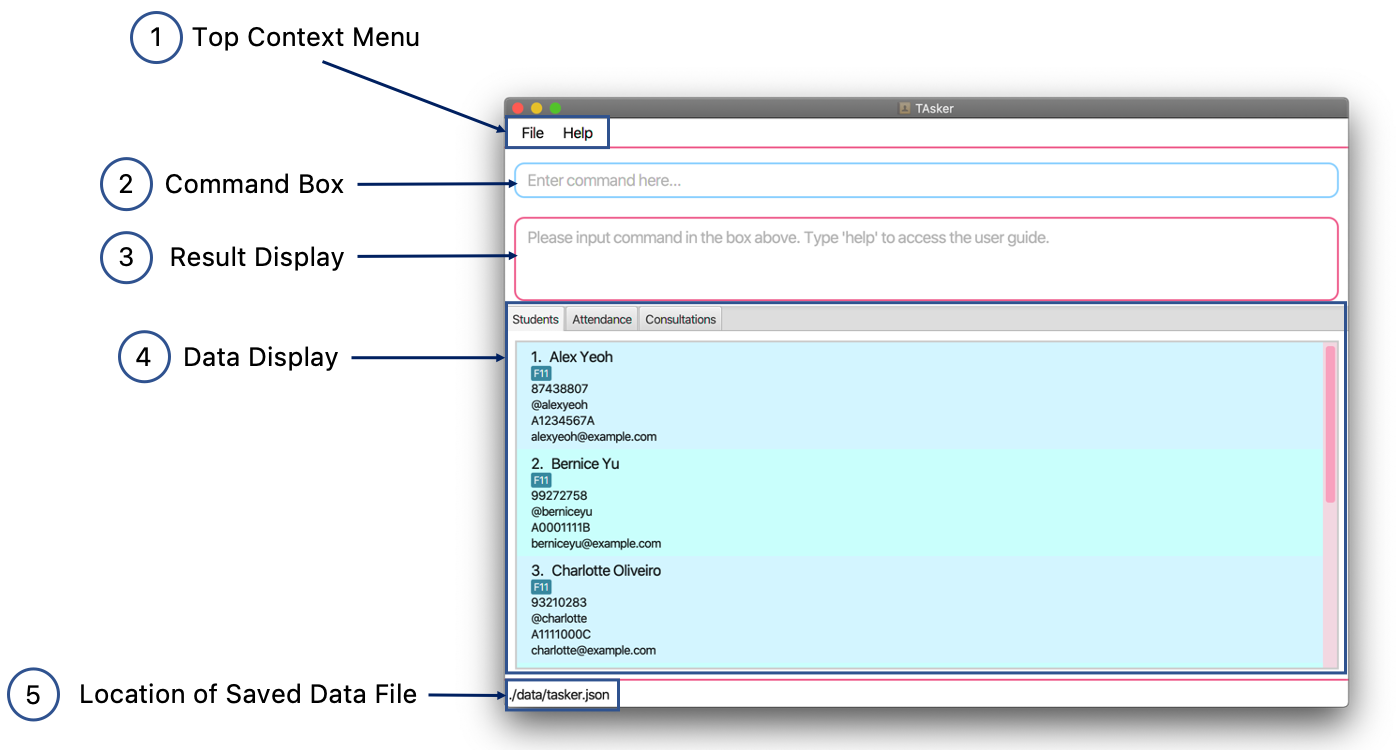
-
Top Context Menu
Allows you to:
- easily exit the app by clicking on “File”
- easily access the user guide by clicking on “Help”
-
Command Box
Main location to interact with all of TAsker’s features. Type all of TAsker’s commands into this box.
-
Result Display
The output of all commands run via the Command Box will be displayed here.
-
Data Display
All of TAsker’s data will be shown and updated here. Navigate across different types of student data by clicking on the tabs.
-
Location of Saved Data File
This tells you the location of the file where all of TAsker’s data is saved in. This helps you to locate the TAsker data file, so that you can copy TAsker’s data to make manual backups or shift TAsker’s data to another computer.
Features
TAsker primarily uses text-based commands that are entered via the Command Box to interact with its features. The commands typically follow the format shown below:
[Verb] [index of Item or Student (for certain commands)] [Parameters (for certain commands)]
For example, a command like add n/John Doe p/98765432 e/johnd@example.com t/johndoe m/A0123456B will add a student (add is the verb), with parameters:
- “98765432” as phone number
- “johnd@example.com” as email
- “johndoe” as Telegram username
- “A0123456B” as matriculation number
In this case, the index is not needed as the add command does not manipulate existing students’ data. The sections for each feature below will document the command needed, as well as it’s associated mandatory and optional parameters.
![]() Notes about the command format:
Notes about the command format:
-
Words in
UPPER_CASEare the parameters to be supplied by the user.
e.g. inadd n/NAME,NAMEis a parameter which can be used asadd n/John Doe. -
Items in square brackets are optional.
e.gn/NAME [tg/TAG]can be used asn/John Doe tg/friendor asn/John Doe. -
Items with
… after them can be used multiple times including zero times.
e.g.[tg/TAG]…can be used as ` ` (i.e. 0 times),tg/friend,tg/friend tg/familyetc. -
Parameters can be in any order.
e.g. if the command specifiesn/NAME p/PHONE_NUMBER,p/PHONE_NUMBER n/NAMEis also acceptable. -
Any invalid parameter tags will be parsed as literals.
e.g. If we pass then/a/Jamesin as a parameter, sincea/is an invalid parameter tag, it will attempt to interpreta/Jamesas aNAME, rather than treatinga/as a parameter tag andJamesas its field. -
Extra inputs to commands will be ignored.
e.g.-
list 1,1will be ignored, -
exit abc,abcwill be ignored.
-
Viewing help : help
Shows a message explaining how to access the User Guide (this page).
Format: help
Expected Output
Running help

Adding a student : add
This is used when we want to save student data into TAsker.
For administrative purposes, teaching assistants usually need the following information from their students:
- Telegram handles
- Name
- Telegram
- Matric Number
They also need the ability to TAG students,
for providing more details about each student, such as their tutorial class, performance and so on.
This feature allows them add all of the above information for a student.
Format: add n/NAME p/PHONE_NUMBER e/EMAIL t/TELEGRAM m/MATRIC_NUMBER [tg/TAG]…
Examples:
add n/John Doe p/98765432 e/johnd@example.com t/johndoe m/A0123456Badd n/Betsy Crowe tg/friend e/betsycrowe@example.com t/betsy_crowe m/A0201234C p/1234567 tg/groupmate
Expected Output
Running add n/John Doe p/98765432 e/johnd@example.com t/johndoe m/A0123456B

Listing all students : list
This is useful when you want to view the information of all students.
The information is displayed under the Students Tab.
Format: list
Expected Output
Running list

Editing a student : edit
If you need to update a student’s information, you can use this feature to do so.
In the event you are trying to delete a student instead, see the delete command below.
You can just provide the relevant fields you want to update to the command.
Format: edit INDEX [n/NAME] [p/PHONE] [e/EMAIL] [t/TELEGRAM] [m/MATRIC_NUMBER] [tg/TAG]…
- Edits the student at the specified
INDEX. The index refers to the index number shown in the displayed student list. The index must be a positive integer 1, 2, 3, … - At least one of the optional fields must be provided.
- If the index is a positive integer, the format for each optional field will be checked in the above order before the index’s validity is verified.
- If all inputs are valid, the existing values will be updated to the input values.
- When editing tags, the existing tags of the student will be removed i.e adding of tags is not cumulative.
- You can remove all the student’s tags by typing
tg/without specifying any tags after it.
Examples:
-
edit 1 p/91234567 e/johndoe@example.comEdits the phone number and email address of the 1st student to be91234567andjohndoe@example.comrespectively. -
edit 2 n/Betsy Crower tg/Edits the name of the 2nd students to beBetsy Crowerand clears all existing tags.
Before Editing

After Editing

Locating students by name : find
If you only remember fragments of a student’s name, you can use feature to lookup that student.
This command finds students whose names contain any of the given keywords.
You can use the list command if you want to view all students again.
Format: find KEYWORD [MORE_KEYWORDS]
- The search is case-insensitive. e.g
hanswill matchHans - The order of the keywords does not matter. e.g.
Hans Bowill matchBo Hans - Only the name is searched.
- Only full words will be matched e.g.
Hanwill not matchHans - Students matching at least one keyword will be returned (i.e.
ORsearch). e.g.Hans Bowill returnHans Gruber,Bo Yang
Examples:
-
find JohnreturnsjohnandJohn Doe -
find alex davidreturnsAlex Yeoh,David Li
Expected Output
Running find alex david

Deleting a student : delete
Deletes the specified student from the address book.
You may use this to remove incorrectly added students.
Format: delete INDEX
- Deletes the student at the specified
INDEX. - The index refers to the index number shown in the displayed student list.
- The index must be a positive integer 1, 2, 3, …
Examples:
-
listfollowed bydelete 2deletes the 2nd student in the address book. -
find Betsyfollowed bydelete 1deletes the 1st student in the results of thefindcommand.
Clearing all students : clear
This clears all entries from the list of students.
When starting up for the first time, TAsker is provided with mock data.
clear can be used to remove all the data to start from a clean slate.
You may also want to use this when starting a new semester, to remove information of the previous semester’s students.
Format: clear
Checking for a student’s attendance : showatt
Shows the attendance for tutorial on a specified date.
Format: showatt INDEX d/DATE
Examples:
-
showatt 1 d/12/12/2020checks if the first student in the list attended class on 12th December, 2020.For example if “John” was our first student, we would get the following response if he was present:
John was present on 2020-12-12If he was absent we would get this instead:
John was absent on 2020-12-12
Marking student’s attendance : attend
Marks the student as present for tutorial on a specified date.
Format: attend INDEX d/DATE
Expected Output

Running attend 1 d/12/12/2000
Examples:
-
attend 1 d/12/12/2000Marks the student at index 1 as present on 12 December 2000. -
attend 2 d/12/01/2002Marks the student at index 2 as present on 12 January 2002.
Unmarking student’s attendance : unattend
Marks the student as absent (default) for tutorial on a specified date.
Format: unattend INDEX d/DATE
Examples:
-
unattend 1 d/12/12/2000Marks the student at index 1 as absent on 12 December 2000. -
unattend 2 d/12/01/2002Marks the student at index 2 as absent on 12 January 2002.
Expected Output
Running unattend 1 d/12/12/2000 (This particular illustration requires attend 1 d/12/12/2000 to be ran first)

Adding a consultation : add-consult
Adds a consultation to the address book.
Format: add-consult n/NAME d/DATE tm/TIME a/LOCATION ty/TYPE
Examples:
add-consult n/John Doe d/10/10/2020 tm/18:00 a/SOC Basement ty/personaladd-consult n/Ann Lim d/30/05/2020 tm/11:00 a/Tembusu College ty/group
Expected Output
Running add-consult n/John Doe d/10/10/2020 tm/18:00 a/SOC Basement ty/personal

Deleting a consultation : del-consult
Deletes a consultation from the address book.
Use this to indicate a consultation has been completed or remove incorrect consultation slots.
Format: del-consult INDEX
Examples:
del-consult 1
Expected Output
For del-consult 1

Listing all consultations : list-consult
Shows a list of all consultations that has been arranged with your students.
You may click on the Consultations tab to view the full list of consultations.
Format: list-consult
Expected Output
Running list-consult

Archiving data files : archive
Creates a copy of all current data, tagged with the current date and time.
Running this command will create a new json file containing all your saved data, in your /data folder.
Format: archive
Example:
-
archivecreates a json file calledtasker_2020-11-09_2113.jsonas shown below.
Expected Output
Running archive

Exporting attendance : exportatt
Exports attendance to a csv file in data/attendance_YYYY-MM-DD_HHmm.csv
Running this command will create a new csv file in your /data folder. Each column corresponds to a student and each row corresponds to a date. Every cell is marked with either ATTENDED or ABSENT depending on whether the student has attended that day.
Format: exportatt
Example:
-
exportattcreates a csv file calledattendance_2020-11-09_2055.csvas shown below.
Expected Output
Running exportatt

Exiting the program : exit
Exits the program.
Format: exit
Frequently Asked Questions (FAQs)
Q: How do I start using TAsker?
A: Refer to our Quick Start Guide here.
Q: How do I transfer my data to another Computer?
A: Install the app in the other computer and overwrite the data folder that TAsker creates with the data folder from your previous TAsker installation. The data folder should be in the folder where TAsker is installed to.
Q: Can I import existing spreadsheets of my students?
A: This is not supported at the moment.
Q: How many students can I store?
A: More than you will ever teach in a lifetime.
Q: How do I save my data?
A: TAsker data is automatically saved in the hard disk after the execution of any command that changes the data. There is no need to save manually.
Q: How do I submit a bug report?
A: Open an issue on our github repository.
Command Summary
| Action | Format, Examples |
|---|---|
| Add Student |
add n/NAME p/PHONE_NUMBER e/EMAIL t/TELEGRAM m/MATRIC_NUMBER [tg/TAG]…e.g., add n/James Ho p/98765432 e/jamesho@example.com t/james-ho m/A0202345B tg/F11
|
| Edit Student |
edit INDEX [n/NAME] [p/PHONE] [e/EMAIL] [t/TELEGRAM] [m/MATRIC_NUMBER] [tg/TAG]…e.g., edit 2 n/James Lee e/jameslee@example.com
|
| Find Student |
find KEYWORD [MORE_KEYWORDS]e.g., find James Jake
|
| List Students | list |
| Delete Student |
delete INDEXe.g., delete 3
|
| Clear All Students | clear |
| Show Attendance |
showatt INDEX d/DATEe.g., showatt 1 d/12/12/2020
|
| Marking Attendance |
attend INDEX d/DATEe.g., attend 1 d/12/12/2000
|
| Unmarking Attendance |
unattend INDEX d/DATEe.g., unattend 1 d/12/12/2000
|
| Add Consultation |
add-consult n/NAME d/DATE tm/TIME a/LOCATION ty/TYPEe.g., add-consult n/John Doe d/10/10/2020 tm/18:00 a/SOC Basement ty/personal
|
| Delete Consultation |
del-consult INDEXe.g., del-consult 1
|
| List Consultation | list-consult |
| Archive Data Files | archive |
| Export Attendance | exportatt |
| Help | help |
| Exit | exit |